Here’s the blog article:Headline: How I Made My Own Custom Drawer Liners (and You Can Too!)
Are your drawers… well, let’s just say less than inspiring? Mine were. Every time I opened them, I was greeted with a mix of dust bunnies, rogue crumbs (how DO those even get in there?), and a general sense of “blah.” I tried everything: reorganizing, decluttering, even those little mesh organizers that always seem to shift around. But nothing really tackled the underlying problem: the sad, often scratched, and sometimes sticky surfaces inside the drawers themselves. That's when I decided to ditch the store-bought options and dive into making my own custom drawer liners.
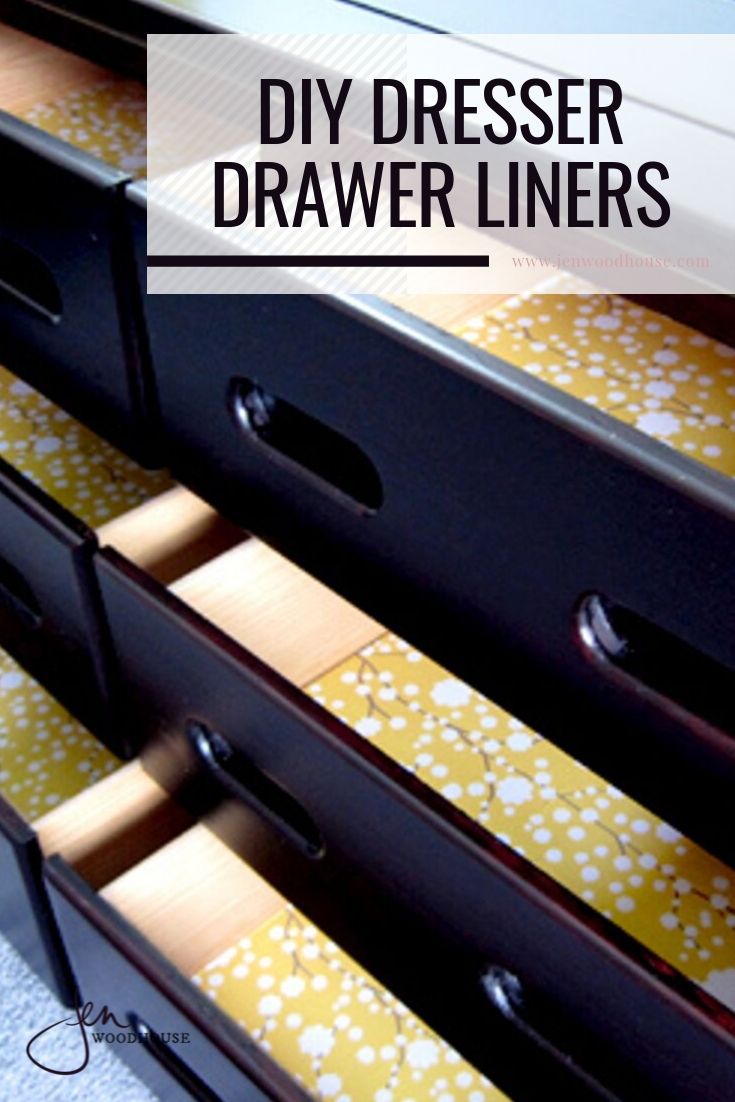
And let me tell you, it was a game-changer! Not only did it instantly elevate the look and feel of my drawers (yes, even drawer interiors can be beautiful!), but it was also surprisingly easy and affordable. Plus, I got to completely customize the look and feel to match my personal style. Ready to transform your drawers from drab to fab? Let's get started!
Why Make Your Own Drawer Liners?
You might be thinking, “Seriously? Drawer liners? Is that really worth the effort?” And honestly, I wondered the same thing at first. But trust me, there are some compelling reasons why making your own custom drawer liners is a brilliant idea: Custom Fit, Every Time: Pre-cut liners are almost never a perfect fit. You end up with gaps, overlaps, or awkward trimming that just looks messy. Making your own ensures a snug, clean fit, regardless of the drawer's size or shape. Endless Design Options: Store-bought liners often come in limited patterns and colors. When you DIY, the possibilities are endless! You can choose fabric, wallpaper, contact paper, or even repurposed materials to create a look that perfectly complements your décor. I personally used a beautiful floral wallpaper remnant that I had leftover from another project – instant chic! Cost-Effective (Especially for Multiple Drawers): Buying pre-cut liners for every drawer in your home can quickly add up. Making your own is often much cheaper, especially if you use materials you already have on hand or find discounted options. It’s a Fun and Satisfying Project: Okay, maybe "fun" is subjective, but I genuinely enjoyed this project! It's a simple, low-stakes DIY that delivers instant gratification. Plus, there’s something incredibly satisfying about creating something beautiful and functional for your home. Protection and Cleanliness:Let's not forget the primary purpose! Drawer liners protect your drawer interiors from scratches, spills, and dust. They're also much easier to clean than the bare wood or laminate. Just wipe them down or replace them entirely if they get too messy.
Gathering Your Supplies
Before you dive in, you'll need to gather a few essential supplies. Don't worry, you probably already have most of these on hand!
Your Material of Choice: This is where the fun begins! Consider these options: Wallpaper: Durable, easy to clean, and comes in a vast array of patterns and colors.
Contact Paper: A budget-friendly option that's also waterproof.
Fabric: Adds a soft, textured touch. Choose a tightly woven fabric like cotton or linen for easy cleaning. You may need to apply a fabric stiffener for durability.
Felt: Great for drawers that store delicate items like jewelry.
Shelf Liner: The non-adhesive kind gives you flexibility in terms of reuse, but can shift around more easily. I've used cork shelf liner in the past for my tools and it worked great! Measuring Tape: Accurate measurements are crucial for a perfect fit. Scissors or Utility Knife: For cutting your chosen material. I prefer a sharp utility knife for wallpaper and contact paper. Ruler or Straight Edge: To ensure straight, clean cuts. Pencil: For marking your measurements. Cutting Mat (Optional): Protects your work surface. Spray Adhesive (Optional): If you want to permanently adhere your liners. I used this for my fabric-lined drawers. Double-Sided Tape (Optional): A less permanent option for securing your liners. Cleaning Supplies:A damp cloth and mild cleaner to wipe down your drawers before installing the liners.
Step-by-Step Guide: Creating Your Custom Drawer Liners
Now for the fun part! Follow these simple steps to create your own custom drawer liners:
1. Prepare Your Drawers
Before you start measuring and cutting, it's essential to clean your drawers thoroughly. Remove everything from the drawer and use a damp cloth with a mild cleaner to wipe down the interior surfaces. Allow the drawers to dry completely before proceeding. This will ensure that your liners adhere properly (if you're using adhesive) and prevent any trapped dust or dirt from causing problems later on.
2. Measure Your Drawers Accurately
This is arguably the most crucial step. Use your measuring tape to carefully measure the inside dimensions of each drawer. Measure the length, width, and even the depth (if you're using a thicker material like felt) to ensure a precise fit. Write down each measurement for each drawer – don't rely on your memory! It's also a good idea to double-check your measurements to avoid mistakes.
3. Cut Your Material to Size
Using your measurements as a guide, cut your chosen material to size. I recommend adding a small extra margin (about ¼ inch) to each side. This allows for slight variations in the drawer dimensions and gives you some wiggle room when installing the liners. You can always trim off any excess material later. Use your ruler or straight edge and pencil to mark your cutting lines on the back of the material. Then, carefully cut along the lines using scissors or a utility knife.
4. Test Fit Your Liners
Before applying any adhesive, test fit your liners in each drawer. Make sure they fit snugly and that there are no gaps or overlaps. If necessary, trim off any excess material until you achieve a perfect fit. This is also a good time to adjust the liners if you want to wrap them slightly up the sides of the drawer for a more finished look.
5. Apply Adhesive (Optional)
If you're using adhesive, carefully apply a thin, even coat to the back of your liners. I recommend working in a well-ventilated area and following the manufacturer's instructions for the adhesive. If you're using spray adhesive, hold the can about 6-8 inches away from the liner and spray in a sweeping motion. For double-sided tape, apply strips along the edges and in the center of the liner.
6. Install Your Liners
Carefully position your liners in the drawers, aligning them with the edges and corners. Press firmly to ensure that they adhere properly to the drawer surface. If you're using spray adhesive, you may need to work quickly to prevent the adhesive from drying out. If you're using double-sided tape, peel off the backing and press the liners into place.
7. Trim Any Excess Material
Once the liners are installed, inspect them for any excess material that needs to be trimmed. Use a sharp utility knife or scissors to carefully trim along the edges, ensuring a clean, even finish.
8. Admire Your Handiwork!
Step back and admire your beautifully lined drawers! You've successfully transformed your drawers from drab to fab with your own custom creations.
Choosing the Right Material: My Personal Experiences
I've experimented with a few different materials for drawer liners, and each has its pros and cons. Here's my take on some popular options: Wallpaper: This is my go-to choice for its durability and wide range of patterns. I've used wallpaper in my dresser drawers and in the kitchen for silverware. It's easy to wipe clean and holds up well to everyday wear and tear. However, it can be a bit tricky to cut perfectly straight, so make sure you have a sharp utility knife and a steady hand. Contact Paper: A great budget-friendly option, especially for drawers that are prone to spills (like under the sink). It's waterproof and easy to wipe clean. However, contact paper can sometimes look a bit cheap, and it's not as durable as wallpaper. I've used it in my bathroom drawers, and it's held up okay, but I'll probably upgrade to wallpaper eventually. Fabric:Fabric adds a soft, luxurious touch to drawers. I used a beautiful linen fabric to line my jewelry drawers. It's perfect for protecting delicate items from scratches and snags. However, fabric can be more difficult to clean than wallpaper or contact paper, and it may require some ironing to keep it looking its best. Make sure to use a fabric stiffener to give it structure.
People Also Ask
Here are a few common questions I've heard about making drawer liners: Can I use paper towels as drawer liners?While technically youcan, it's not a great idea. Paper towels are flimsy and will tear easily. They also won't protect your drawers from spills or moisture. Invest in a more durable material for better results. How do I prevent my drawer liners from sliding around?If you're not using adhesive, double-sided tape or a non-slip shelf liner can help keep your liners in place. Can I use drawer liners in kitchen cabinets?*Absolutely! Drawer liners are a great way to protect your kitchen cabinets from spills, crumbs, and scratches.
Final Thoughts
Making your own custom drawer liners is a simple yet impactful way to elevate the look and feel of your home. It's a fun, affordable, and customizable project that anyone can tackle. Don't be afraid to experiment with different materials and designs to create liners that perfectly reflect your personal style.
My biggest tip? Don't overthink it! Just grab your supplies, take your measurements, and get creative. Even if you make a few mistakes along the way, you'll still end up with drawers that are more beautiful and functional than before. And that’s a win in my book! So go ahead, transform those drawers from drab to fab – you'll be amazed at the difference it makes!